

Label set #1: Click to enlarge and then press "print".

Label set #2: Click to enlarge and then press "print".

Label set #3: Click to enlarge and then press "print".
 Label set #4: Click to enlarge and then press "print".
At risk of stating the obvious, the larger labels are for larger jars while the smaller ones...well...you know!!
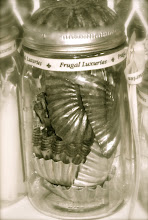
 We used a sepia toned paper to print our labels, but plain paper works nicely too! I don't care to use card stock for this project as it's a bit too stiff and heavy to work with. As you can see, I simply cut out the printed labels using ordinary scissors (Fiscars scissors are among my favorite frugal luxuries!!!) and glued them onto the re~purposed jars and bottles using an ordinary glue stick! Easy as print...cut...and glue!!!
Hope you find these as fun and as useful as we do...and please feel free to share your finished projects when and if you are so inclined...pictures make our day!!!
Warmly,
Tracey and Family
x0x
P.S. Just a little note to say that the labels aren't enlarging as I thought they would. (I had to scan them in as images/photos in order to get them to load.) If you need them larger...one strategy is to copy and paste each label set into a word processor file (such as Word) and adjust the size within there. These labels are a nice size and should work nicely for most projects but just wanted to let you know you had options! :)
 We used a sepia toned paper to print our labels, but plain paper works nicely too! I don't care to use card stock for this project as it's a bit too stiff and heavy to work with. As you can see, I simply cut out the printed labels using ordinary scissors (Fiscars scissors are among my favorite frugal luxuries!!!) and glued them onto the re~purposed jars and bottles using an ordinary glue stick! Easy as print...cut...and glue!!!
Hope you find these as fun and as useful as we do...and please feel free to share your finished projects when and if you are so inclined...pictures make our day!!!
Warmly,
Tracey and Family
x0x
P.S. Just a little note to say that the labels aren't enlarging as I thought they would. (I had to scan them in as images/photos in order to get them to load.) If you need them larger...one strategy is to copy and paste each label set into a word processor file (such as Word) and adjust the size within there. These labels are a nice size and should work nicely for most projects but just wanted to let you know you had options! :)


 Posts
Posts







.jpg)


